A Beginner’s Guide to Basement Waterproofing Materials and Methods

A dry basement does not happen by accident. It is the result of managing water before it reaches the foundation, controlling moisture that slips through, and understanding the difference between a damp smell and a real structural warning sign. For beginners, Basement Waterproofing can seem confusing because the term covers a lot of ground. It includes exterior excavation, drainage systems, sealants, crack repair, sump pumps, vapor barriers, and grading work in the yard. Some of those measures are preventive. Others are reactive. A few are worth every dollar. A few are commonly oversold.
If you have ever walked into a basement after a hard rain and found a dark line creeping along the wall-floor joint, you already know the issue feels urgent. Water has a way of turning small defects into expensive repairs. Wet insulation sags. Paint peels. Cardboard boxes wick up moisture overnight. Mold does not need standing water to thrive. It only needs persistent humidity and a food source.
The good news is that most basement moisture problems follow patterns. Once you understand how water moves around a house, the materials and methods make a lot more sense.
Why basements get wet in the first place
Water does not need a dramatic opening to enter a basement. Concrete and masonry are porous. They can absorb and transmit moisture even when there is no visible crack. Hydrostatic pressure, which is the pressure exerted by groundwater against the foundation, can push moisture through tiny pores and weak points. This is one reason a basement can feel clammy even when you never see an actual puddle.
Surface water is often the bigger culprit. Overflowing gutters, short downspouts, and yard grading that slopes toward the house can dump a surprising amount of rainwater against the foundation. I have seen basements with interior drainage systems installed at considerable cost where the root cause was a downspout ending two feet from the wall. Redirecting that water did more than any coating ever could.
Seasonal changes also matter. In spring, thawing soil and heavy rains increase groundwater levels. In summer, warm humid air enters cool basements and condenses on cold surfaces. In older homes, stone or block foundations have more joints and more opportunities for water entry than monolithic poured concrete walls. Newer basements are not immune either. A poorly compacted backfill zone, a clogged footing drain, or a hairline shrinkage crack can create problems within a few years of construction.
Before you choose materials, you need to identify which kind of water issue you have. There is a meaningful difference between moisture vapor, intermittent seepage, and active water intrusion.
Reading the signs before choosing a method
A basement leaves clues. White chalky residue on concrete or masonry, called efflorescence, points to water moving through the material and leaving mineral deposits behind. Musty odors often signal chronic humidity rather than bulk water intrusion. A puddle after only severe storms suggests one type of weakness. Dampness every time the soil is saturated suggests another.
Watch where moisture appears. If water shows up in the middle of a wall, the issue may be a crack, porous masonry, or exterior water buildup. If it appears where the wall meets the floor, the pressure may be forcing water up through the cove joint, which is the seam between wall and slab. If condensation forms on pipes or walls during hot weather, you may be dealing with indoor humidity rather than groundwater.
A simple check can help. Tape a square of aluminum foil or plastic tightly to a section of wall for a day or two. If moisture forms on the room side, that points to indoor humidity. If moisture forms behind it, against the wall, the wall itself is transmitting moisture. It is not a laboratory test, but it gives homeowners a more useful starting point than guesswork.
Exterior waterproofing versus interior water management
One of the biggest beginner mistakes is assuming all waterproofing systems do the same job. They do not.
True exterior waterproofing attempts to stop water before it enters the foundation wall. This usually involves excavating around the foundation, cleaning the wall, repairing defects, applying a membrane or coating, and protecting that membrane before backfilling. It often includes footing drains or drainage boards to relieve pressure and carry water away.
Interior systems, by contrast, usually manage water after it reaches the foundation. They do not always stop the wall from getting wet. Instead, they channel water to a sump basin or drain so it cannot damage the finished space. These systems can be very effective, especially where exterior excavation is impractical, but it is important to understand what problem they solve.
That distinction matters when evaluating products and contractor promises. A paint-on interior coating can help with mild moisture migration, but it is not a cure for hydrostatic pressure. An interior drain tile system can keep the floor dry, but it does not protect the outer face of the wall from long-term moisture exposure. Sometimes that is acceptable. Sometimes it is not.
The main materials used in Basement Waterproofing
The materials themselves fall into a few broad categories, each with a specific role. Confusion starts when one material is expected to do the work of another.
Cementitious coatings
Cementitious coatings are mixtures that bond to masonry and concrete surfaces. They are often used on interior basement walls because they are relatively affordable and easy to apply. They can resist minor moisture transmission and provide a clean finished look.
Their limitation is flexibility. Concrete moves. Foundations settle slightly. Seasonal temperature changes create stress. A rigid cementitious coating can crack if the substrate shifts, which is why it is rarely the best answer for active leaks or wider foundation cracks. It is more of a supporting measure than a complete solution.
Liquid-applied membranes
These are brush, roller, or spray-applied products that cure into a flexible waterproof layer. Exterior-grade versions are commonly used on foundation walls after excavation. Better membranes can bridge small cracks and maintain adhesion under damp soil conditions.
Quality varies widely. Some are thin damp-proofing products that handle soil moisture but not sustained water pressure. Others are true waterproofing membranes designed for below-grade use. That difference is not always obvious on first glance, so reading the technical data matters. A good membrane also depends on careful surface preparation. Dirt, laitance, and sharp voids can compromise it quickly.
Sheet membranes
Sheet membranes are preformed waterproofing layers, often rubberized asphalt or similar materials, applied to the outside of the foundation wall. They offer consistent thickness and can perform very well when installed carefully. Their seams, overlaps, and transitions around penetrations need close attention. A rushed installation can create hidden failure points.
These systems are common in high-performance foundation work and on new construction because the wall is accessible before backfill. Retrofitting them on an existing house requires excavation, which drives up cost.
Drainage boards and protection boards
These are not waterproofing membranes by themselves, but they are important companions to exterior systems. A drainage board creates a path for water to move downward to footing drains instead of pressing directly against the wall. A protection board shields the membrane from damage during backfilling.
Skipping these layers is one of those false economies that can haunt a project later. A perfectly good membrane can be punctured by careless backfill or crushed by uneven pressure.
Polyurethane and epoxy crack injection materials
For poured concrete walls with discrete cracks, injection repair can be extremely effective. Polyurethane is often used where active water leaks are present because it expands and seals pathways. Epoxy is more structural and is used where restoring bond across a crack is the goal.
This is one area where diagnosis matters more than product hype. A non-structural shrinkage crack that leaks during storms may respond well to polyurethane injection. A crack caused by significant settlement or lateral pressure may need more than injection. If the wall is bowing or displaced, crack sealant alone is not a responsible repair.
Sealants and caulks
These are useful for small joints around pipe penetrations, windows, and minor gaps, but they are often misunderstood. Sealants are finishing materials, not miracle cures. If water pressure is building behind the wall, surface caulk rarely solves much for long.
Vapor barriers
In basement conversations, vapor barriers are sometimes lumped in with waterproofing, but their job is different. They slow moisture vapor movement. You may see them in wall assemblies, under slabs, or over https://charliekdlm907.summitquill.com/posts/how-basement-waterproofing-supports-a-healthier-home-environment crawlspace soil. They are important for controlling humidity and protecting finishes, though they do not stop liquid water entering through a foundation defect.
Exterior methods that solve problems at the source
When budgets allow and site conditions make it possible, exterior work is often the most complete approach because it addresses water before it enters the structure. The catch is that it can be invasive and expensive.
Excavation exposes the foundation wall down to the footing. Once exposed, the wall can be cleaned and inspected properly. This often reveals things homeowners never knew were there, honeycombing in the concrete, failed parging on block walls, deteriorated mortar joints, or old patch repairs that have let go. Cracks can be repaired, voids filled, and the wall prepared for a membrane.
After membrane application, many professionals add a drainage board and verify that footing drains are open and correctly sloped. If there is no functioning drain at the base of the footing, the best wall membrane in the world still has to contend with trapped water. That is why drainage and waterproofing need to work together.
Yard drainage improvements are also part of exterior waterproofing, even though they are less glamorous. Regrading soil so it slopes away from the house, extending downspouts well beyond the backfill zone, and preventing roof runoff from dumping near the foundation can dramatically reduce water load. On some houses, these simpler corrections solve most of the problem without excavation.
I once looked at a basement where the owner was preparing for an interior drainage installation. The walls were damp, and one corner had leaked twice that season. Outside, a flower bed had been built up over the years until the mulch sat against the siding, and two downspouts were discharging into that bed. We corrected the grade, extended the downspouts, and lowered the soil line. The basement did not become museum-dry overnight, but the active leakage stopped. That is a common pattern. Start with water management outside before assuming the basement itself needs major surgery.
Interior methods when exterior access is limited
Interior systems are common because they work around driveways, decks, neighboring properties, and finished landscaping that make excavation difficult. They are especially practical when the primary issue is water reaching the cove joint or rising beneath the slab.
An interior perimeter drainage system usually involves cutting a narrow trench around the inside edge of the slab, placing a perforated drain in stone, and directing collected water to a sump basin. The slab is then patched back. Water that enters at the wall base or under the floor is intercepted and pumped out before it can spread across the basement.
These systems can be highly effective for managing recurring seepage. They do not remove exterior moisture from the wall itself, but they keep the interior space usable. In many real homes, that is the practical objective.
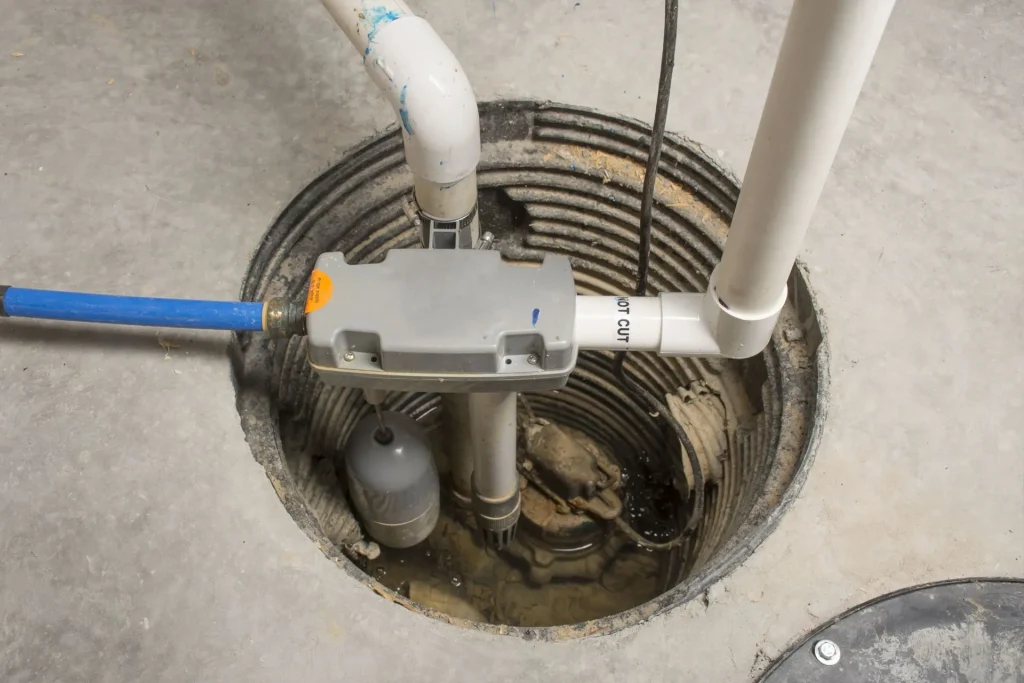
Sump pumps are central to these systems. A good pump setup should include a reliable discharge line, a check valve, and ideally battery backup if storms in your area tend to knock out power. I am skeptical of any basement waterproofing plan that relies on a pump but ignores backup power. The worst leaks tend to happen during weather events, which is exactly when outages are most likely.
Interior wall channels or cavity drain membranes are another option in some basements. These systems create a controlled path for wall seepage to move down into the drainage system without entering the room. They are more common in basements that are being finished or renovated because they can be integrated into a wall assembly.
What coatings can and cannot do
Paint-on waterproofing products are often marketed as simple solutions, which makes them appealing to beginners. Used appropriately, they have value. Used as a cure-all, they disappoint.
An interior masonry waterproofer can reduce minor dampness and improve appearance. It may help in a basement with slight moisture migration and no active leaks. It is not likely to withstand sustained hydrostatic pressure if water is being forced through the wall or floor. In those cases, the coating may blister, peel, or fail at joints and cracks.
This is one of the most common mismatches between problem and product. If you can wipe away moisture with your hand and the wall sometimes darkens after rain, a coating might be part of the answer. If water visibly runs in, or the floor joint seeps repeatedly, look beyond coatings.
Matching methods to common basement conditions
Beginners often ask for the single best waterproofing method. There is no honest one-size-fits-all answer. The right method depends on the foundation type, severity of water intrusion, access, budget, and whether the basement will remain unfinished or become living space.
Here is a practical way to think about it:
- Mild humidity or slight wall dampness may call for dehumidification, better ventilation control, gutter and grading fixes, and possibly an interior masonry coating.
- Isolated poured-concrete wall cracks often respond well to injection repair, assuming there is no larger structural movement.
- Recurring seepage at the wall-floor joint usually points toward drainage issues, often solved with exterior improvements or an interior perimeter drain and sump.
- Widespread leakage through block or masonry walls may require a broader system, sometimes combining exterior drainage work with interior water management.
- Finished basements deserve a more conservative approach because hidden moisture can damage framing, insulation, and flooring long before you notice it.
That last point is worth emphasizing. An unfinished basement can tolerate a little imperfection. A finished one cannot. If you are planning drywall, flooring, or built-ins, moisture control has to be more robust than the minimum needed to keep a storage space mostly dry.
Cost, disruption, and what beginners often underestimate
Waterproofing costs vary enormously by region, house design, and problem severity. A few downspout extensions and grading corrections may cost a few hundred dollars if done simply. Crack injection is usually measured per crack and can be modest compared with larger systems. Interior drainage systems and sump installations can climb into the thousands. Full exterior excavation with membrane and drain replacement is often the most expensive route.
Beginners often underestimate the disruption more than the price. Interior drain installations create dust and noise. Exterior excavation can disturb walks, shrubs, patios, and access to the home. If the house is older, you may uncover related issues such as deteriorated drain lines, missing footings in sections, or abandoned repairs.
That does not mean you should fear the work. It means you should treat basement waterproofing as a building-system decision rather than a cosmetic project.
Choosing a contractor without getting oversold
Because basements make people anxious, this field attracts both very good specialists and aggressive sales operations. A strong proposal should describe where water is entering, why the recommended method addresses that path, and what limitations remain.
Ask what evidence supports the diagnosis. Ask whether exterior water management has been evaluated. Ask if the system is stopping water, redirecting it, or simply covering up symptoms. A trustworthy contractor can explain trade-offs clearly.
Pay attention to specificity. “Waterproof the basement” is vague. “Inject two wall cracks, extend downspouts, install interior perimeter drain on the north and east walls, and discharge to a sealed sump with battery backup” is a real scope of work.
Maintenance after the waterproofing is done
No system is truly install-and-forget. Even excellent basement waterproofing needs basic maintenance. Gutters clog. Downspouts disconnect. Sump pumps wear out. Discharge lines freeze in winter if they are poorly arranged. Exterior grading settles over time.
A simple annual check prevents a lot of grief:
- Clean gutters and confirm downspouts discharge well away from the foundation.
- Test the sump pump and backup system before the wet season.
- Inspect basement walls and floor edges for new cracks, staining, or efflorescence.
- Keep stored items off the floor, especially in basements with any history of seepage.
- Run a dehumidifier when summer humidity rises, especially in finished spaces.
These are not dramatic tasks, but they preserve the value of the larger work.
A few final judgment calls that matter
Not every damp basement needs a full waterproofing system. Not every leak can be solved with a can of coating from the hardware store. The skill is knowing the difference.
If you are dealing with a minor issue, start outside. Roof water and surface drainage are frequent offenders, and they are often the least expensive problems to fix. If you have a poured concrete wall with one active crack, targeted repair may be enough. If seepage is chronic and appears at the cove joint during storms, drainage is likely central to the solution. If the basement will be finished, raise your standards and design for hidden moisture, not just visible puddles.
Basement Waterproofing works best when it is approached as water management, not magic. The materials matter. The methods matter more. The diagnosis matters most. Once you understand that, the subject becomes far less mysterious, and the odds of spending money wisely go up fast.
ARD Waterproofing
98 Smull Ave, West Caldwell, NJ 07006, United States
+1 917-691-8411
FAQ About Basement Waterproofing
Can you 100% Waterproof a Basement in West Caldwell?
A properly designed system can substantially reduce basement water intrusion, but no method can promise protection against every flood, equipment failure, or future change in site conditions. The first step is identifying whether moisture comes from surface runoff, groundwater, plumbing, or condensation. Solutions may include grading and gutter improvements, drainage, foundation repairs, and a sump system. Review the specific coverage and exclusions of any written warranty.
How much does it cost to professionally waterproof a basement in NJ?
There is no single price that fits every basement. Cost depends on the cause of the leak, the area needing work, access, excavation requirements, drainage design, sump equipment, and restoration of disturbed finishes or landscaping. Request an on-site assessment and an itemized written estimate that explains the scope, exclusions, and maintenance requirements before comparing proposals.
How long does foundation waterproofing last in West Caldwell, NJ?
Service life varies with the waterproofing materials, installation quality, soil and water conditions, and maintenance. Drainage components and pumps may require servicing or replacement even when other parts of the system remain functional. Keep gutters, drainage outlets, and sump equipment maintained, and have recurring leaks or changes in foundation condition assessed. Ask for product-specific expectations and written warranty terms rather than relying on one lifespan for the entire system.